Cisco ACI Simulator
Inbetriebnahme des Cisco ACI Simulatiors
Download –> Cisco ACI Simulator
Ich selber habe die Version 6 installiert.
Beim ersten Hochlaufen, bzw immer beim neustarten müssen die Daten neu eingegeben werden.
Bei fast allen Einstellungen musste ich die vorgeschlagenen Werte übernehmen, sonst wurden die Spine und Leaf Switche nicht erkannt.
Einzig die Management IP Adresse musste dem eigenen Netzwerk enstprechend eingegeben werden
Dazu muss das eigene Passwort eingegeben werden.
IPv6 habe ich nicht aktiviert.
Vorgaben von Cisco:
|
Fabric name |
Fabric domain name |
ACI Fabric1 |
||
|
Fabric ID |
Fabric ID |
1 |
||
|
Number of active controllers |
Cluster size |
3
|
||
|
POD ID |
POD ID |
1 |
||
|
Standby controller |
Setup standby controller |
NO |
||
|
Controller ID |
Unique ID number for the active APIC instance. |
Valid range: 1-32 |
||
|
Controller name |
Active controller name |
apic1 |
||
|
IP address pool for tunnel endpoint addresses |
Tunnel endpoint address pool |
10.0.0.0/16 This value is for the infrastructure virtual routing and forwarding (VRF) only. This subnet should not overlap with any other routed subnets in your network. If this subnet does overlap with another subnet, change this subnet to a different /16 subnet. The minimum supported subnet for a 3 APIC cluster is /23. If you are using Release 2.0(1) the minimum is /22. |
||
|
VLAN ID for infrastructure network1 |
Infrastructure VLAN for APIC-to-switch communication including virtual switches
|
|||
|
IP address pool for bridge domain multicast address (GIPo) |
IP addresses used for fabric multicast . For Cisco APIC in a Cisco ACI Multi-Site topology, this GIPo address can be the same across sites. |
225.0.0.0/15 Valid range: 225.0.0.0/15 to 231.254.0.0/15, prefixlen must be 15 (128k IPs) |
||
|
IPv4/IPv6 addresses for the out-of-band management |
IP address that you use to access the APIC through the GUI, CLI, or API. This address must be a reserved address from the VRF of a customer |
— |
||
|
IPv4/IPv6 addresses of the default gateway |
Gateway address for communication to external networks using out-of-band management |
— |
||
|
Management interface speed/duplex mode |
Interface speed and duplex mode for the out-of-band management interface |
auto Valid values are as follows
|
||
|
Strong password check |
Check for a strong password |
[Y] |
||
|
Password |
Password of the system administrator This password must be at least 8 characters with one special character. |
— |
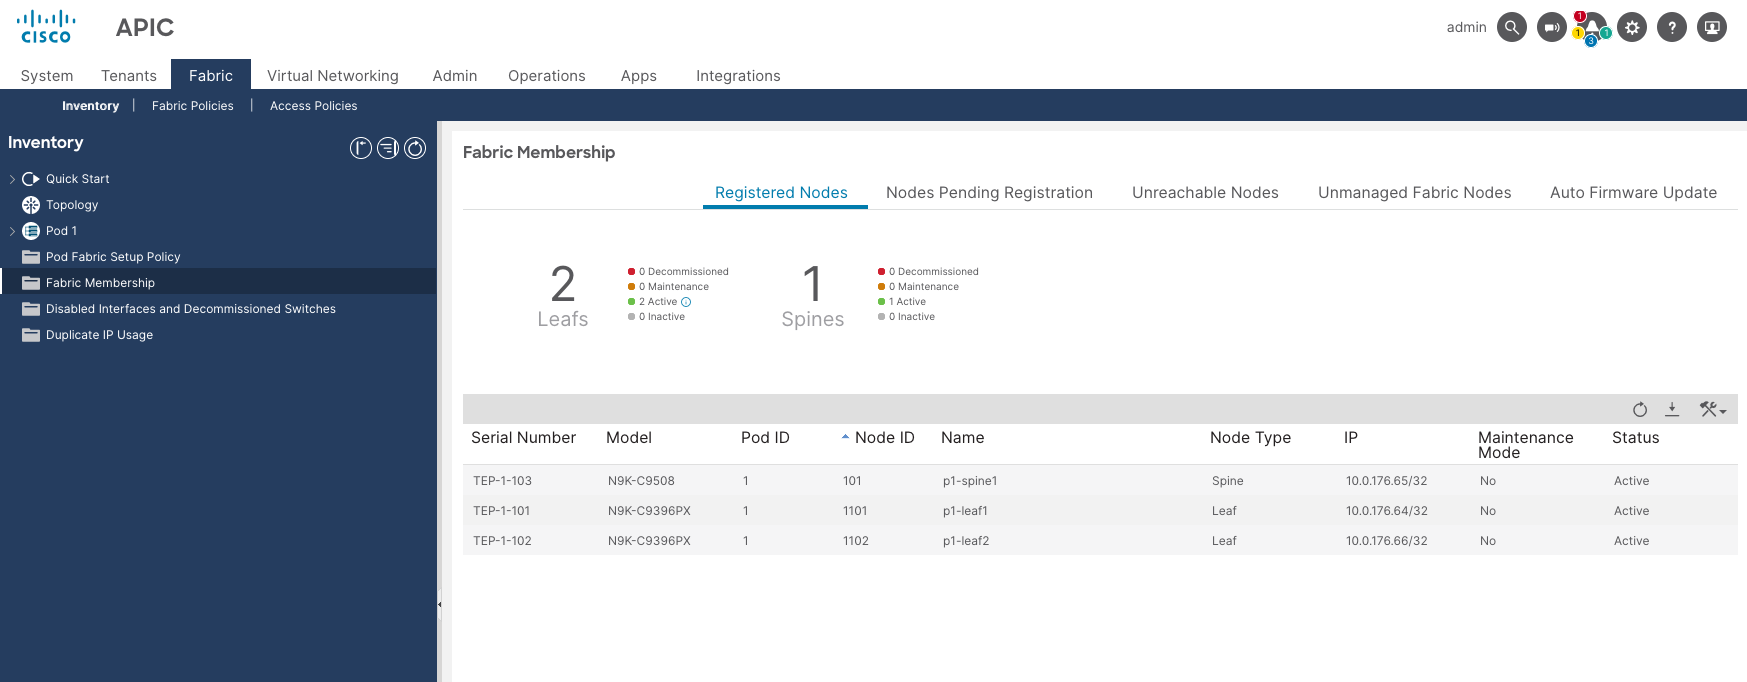
Ist der Controller gestartet dann kann man unter Fabric/Inventory/Fabric Membership/Nodes Pending Registration, der erste Leaf eingebunden werden.
Nachdem der eingebunden wurde und neu gestartet ist (erfolgt automatisch) kommt der Spine Switch der eingebunden wurde, danach erscheint der 2. Leaf Switch.
Namen die ich vergeben haben
| Pod ID | Node ID | Name |
| 1 | 1101 | p1-leaf1 |
| 1 | 1102 | p1-leaf2 |
| 101 | p1-spine1 |
Danach erscheinen die Switche unter Fabric/Inventory/Fabric Membership/Registered Nodes

Die Topology kann man sich unter Fabric/Inventory/Topolgy/Topology anschauen

Das ganze kann man sich auch auf der CLI anschauen
show Controller

show Switch

Drei Tenants sind schon von vornerein angelegt und können nicht gelöscht werden!

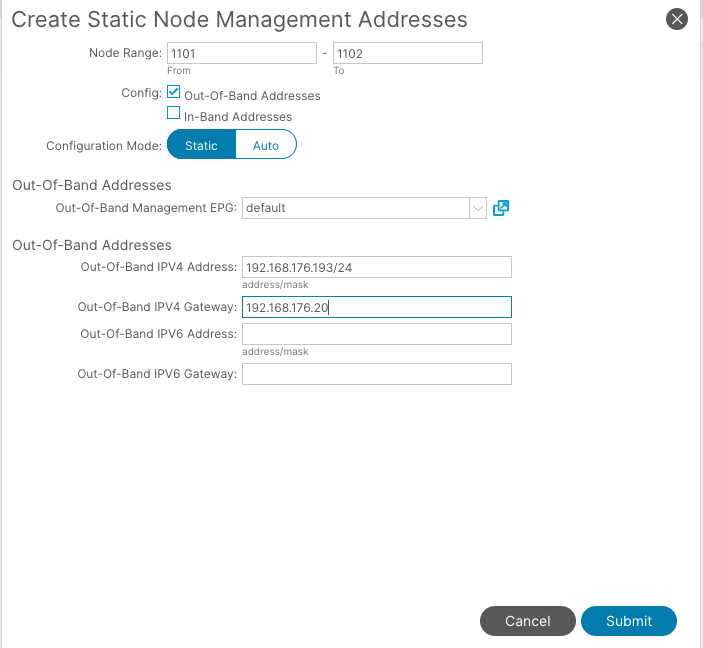
Einstellen der Management Adressen für die Switche
Tenants –> mgmt –> Node Mangement Address

mit der rechten Maustaste auswählen –> Create Static Node Managemet Address
Die Switche auswählen und die Startadresse(!) eingeben, die Switche bekommen aufsteigend IP Adressen zugewiesen


